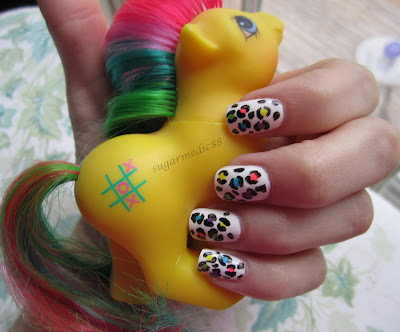
And, because I'm calling this an 80s Leopard Print, what's more 80s than My Little Pony!? So introducing... Baby Tic-Tac-Toe

This would look great on short nails, by the way!! But if this is too loud for you, there are definitely ways to tone it down by using a more neutral base color or more neutral spots. It doesn't have to be this stark white and brightly colored!! Hope you enjoy my little tutorial :)
Polishes and Materials Used:
♥ Sally Hansen Xtreme Wear in White On as a base
♥ Poshe
♥ China Glaze Flip Flop Fantasy (pink)
♥ Ardene Sunshine (yellow)
♥ China Glaze Tree Hugger (green)
♥ Zoya Phoebe (blue)
♥ China Glaze Spontaneous (purple)
♥ Sinful Black on Black (black)
♥ ELF Studio Angled Eyeliner Brush (available in Target stores for only $1)
- You could probably use toothpicks for this if you can't find this brush. But if you like doing nail art or want to give it a shot, I highly suggest investing in this $1 brush while it's available =P
♥ Dotting Tool
- If you do not own a dotting tool, you can use a bobby pin, old pen, or a tootpick. If using a toothpick, I suggest cutting the tip so it's not so pointy. This is allow it to make larger dots.
♥ Cotton Pad with Acetone
♥ Notecard or paper to make dots of polish on
Here's a comparison of some of the around the house tools you can use:

The polishes I'm using:

How to do it:
1. I started with 2 coats White On and 1 coat Poshe (by the way, I REALLY love White On. It's an amazing white)


When using a quick dry top coat like Poshe or Seche Vite, I prefer to wait a while before I use a dotting tool. Just because the polish can still be a little tacky, and you may not get the dot the way you want it.
2. I've already chosen my colors as stated above. I made one dot per nail of each color. (Instead of doing one nail at a time, do all 10 with pink, then all 10 with yellow, etc. to reduce the time it takes to do this).

3. Then, with your brush, you're going to draw little curved lines around two sides of each dot, leaving a gap on either side of the lines so they do not touch. Once all dots are encapsulated, fill in gaps with random black splotches with your brush.*
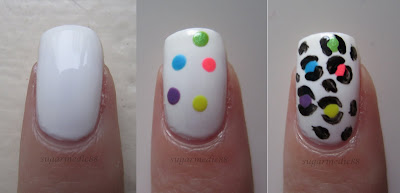
*Keep a cotton pad with acetone next to you. Wipe your brush off on the pad after each nail or as needed so the brush doesn't become stiff due to dried polish. It's ok if it because a little stiff, because it prevents it from spreading very wide so you can draw a thinner line and have more control.
Another recommendation is when you're making a dot of polish on your notecard or paper, don't keep putting it in the same spot when it starts to dry. It will stay tacky if you do that and your brush won't always pick up just the fresh liquid polish.
Here's my workspace after everything was done. You'll see the cotton pad with brush marks and different dots of color all over the notecard. FYI, you see colors I didn't use because this is the same card I used for my Camo Nails:

I didn't use a top coat in these photos, but if you want to, wait a little while and top with a top coat if you choose, and you're done!!


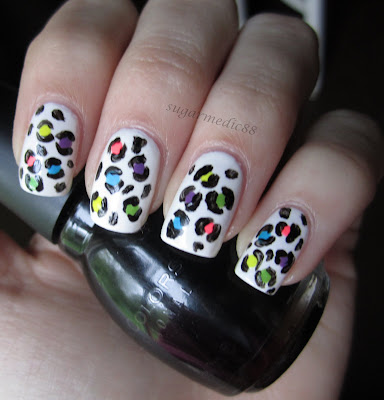
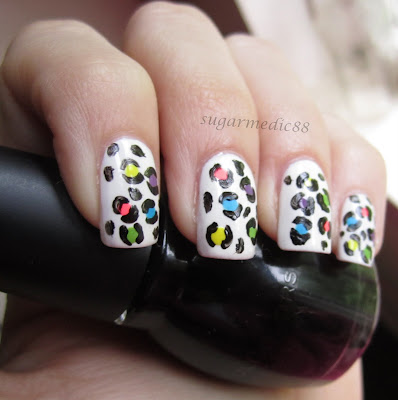
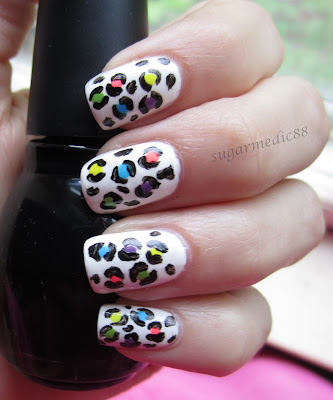

And because I just can't get enough of Baby Tic-Tac-Toe...

And for my awesome followers/readers, I suppose I should mention where I came up with a My Little Pony. Well, I've been collecting them for a... VERY long time. I had them when I was a child, and when I was about 9, I would buy them when I saw them at yard sales. By 11, I was purposely going to Goodwill and flea markets hunting for them. By 12, I was having my mother bid on ponies on eBay. My collection is currently stored away and apart from stumbling across a pony or two here or there, I am on a collecting hiatus. I have hundreds of ponies, I believe my last count was around 400. I only collect the old ones (from the 80s and early 90s), but I do have a few newer ones as well. So there. Just a little more about me!!

I am going to have to try that out!
ReplyDeleteWhat a great post.
ReplyDeleteFirstly, I love the design and your choice of colours.
Secondly, that white polish is awesome.
Finally, what a cool tutorial.
This comment has been removed by the author.
ReplyDeletedotting tool*
ReplyDeleteI loved your different options for dotting tools!!
ReplyDeleteOh and about MLP ... I was a poor child who could only dream of getting a MLP. However, I did inherit a couple of them and a barn! hell yea from the salvation army. It was awesome :D
I love this tutorial :)you inspired me to try this out!
ReplyDeleteI have also recommended this page on my blog, I hope that's okay <3
Brooke x
Hi. Love this tutorial!! However i have the same Sally Hansen "White On" that you do, but it always comes out gloopy and hard to paint on- it's the case with any white polish for me! Any ideas on how to get a neat white polish manicure? Thanks :) xo
ReplyDeleteOoh! I'll be trying this this weekend :) Oh, and if you don't have a dotting tool, you can take the cotton off of a cotton swab and use that. You just wipe off the wet polish with a tissue in between colors. :)
ReplyDeleteI also wanted to let you know I tried out your method and blogged my results :)
Deletepinned this post lovely
ReplyDeleteSomeone on Instagram called nailldesigntutorials posted some pictures of these pictures claiming that she did them
ReplyDelete