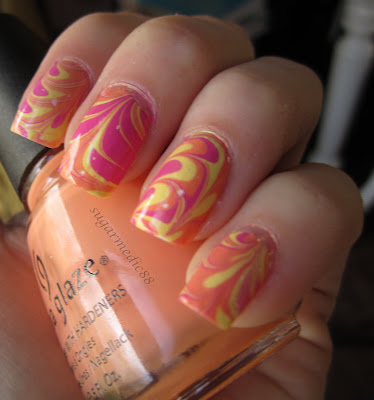
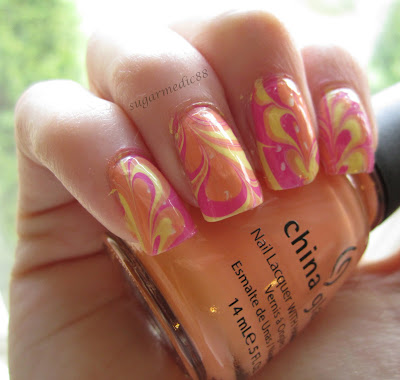
This was the water marble I intended on doing a tutorial with. However, I only got partially done with it using this water marble. I'll have to finish it another time soon. Anyway, this probably wouldn't have been the best because I did this around 1700 in the evening and the lighting wasn't fantastic, and I had initially started outside, but then all of a sudden the wind picked up and I had to move inside. So I took about half of the photos I wanted to take. Even worse, I was dipping my clean up brush into my bottle of remover and it FELL IN. What a gosh darn mess. So I didn't use it after that because the paint on the handle of the brush was smearing all over thanks to the acetone. So be forewarned that my right hand doesn't have as nice of clean up. I'll discuss another issue with the water marble at the end of the post.


Base:
1 coat Sally Hansen Xtreme Wear in White On
For the water marble:
China Glaze Peachy Keen
China Glaze Lemon Fizz
Orly Basket Case
So here are the two things that I was annoyed at by the end of the water marble.
1. My initial pattern (as seen on my ring finger on my left hand, which are the first photos), ended up altered from the rest. Looking back at photos I took during the process, I realized why I wasn't getting the same pattern on the rest of my nails... because I wasn't doing the initial pattern in the water. Ugh. So I only realized that after I uploaded the photos and my nails were done. Sucks because I REALLY liked how that first nail came out.
2. I had horrible, horrible bubbles with this marble. Because my technique was no different than usual, I can only assume it had something to do with one or more of the polishes I used. If you hadn't noticed, go back and look at the photos and you'll see random little white dots. Those were bubbles that were popped with the top coat was put on. I definitely get bubbles sometimes, but NEVER this bad. I'm kinda confused. But in the future, I think instead of a white base, I might do the lightest color I'll be using in my water marble. Hopefully that will camouflage the bubbles if it happens this badly again.
I might just redo this entire water marble later on. It's more summery anyway, so it'll be perfect in a couple of months.

Great nails, love your use of colours. I gave you an award over at my blog.
ReplyDeletewow!! tht looks sooo sooo awesome! :)
ReplyDeleteLove your water marble mani. I need to try it out some day :)
ReplyDeletediscovered your blog by a link you posted on a question at Y!A.
ReplyDeleteLove this look. I'm ok w/ each nail being different, with this style I think it might not look as great w/ the nails being identical. This way it has a more natural or organic feel (if that makes any sense).
FWIW: in the photos, the random white dots look like part of the design & yes I noticed them right away because it made me think of the marbelized paper I make---sometimes random dots turn up.
I love the nails and I'm very glad you could help me w/ my info, cause I was having a really hard time. I couldn't figure out what I was doing wrong, but then I saw I was using a really thick polish. If I ever need help, I'm coming back to this page!!!
Delete