Pages

Tuesday, May 10, 2011

Illamasqua Load... it's EXACTLY what you're thinking.

For Application Tips For This Polish, Please Click HERE And Scroll To The Bottom

Edit!!
Ok, so I went around to other blogs after I posted this to see if other people had the same application problems I did. I obviously came across Scrangie's pretty quickly and noticed she said almost the exact same thing I titled my post!!
"Load. Yep, it's exactly what you think it is." I totally swear I had not seen this (or maybe I had, but I had totally forgotten I had seen it) when I titled this post. My intention was NOT to steal that concept from Scrangie!! I'm leaving it, though, because it still makes me laugh when I see it. I guess there's only so much you can say about an off-white polish called "Load". Back to the original post:

Load. *snickers*. Ok, not gonna lie, a fairly good sized portion as to why I bought this polish was because of how hilariously inappropriate it is. It is from Illamasqua's collection from 2011 Valentine's Day called Throb. I love how the name of the collection makes this polish even MORE risqué.

I picked this up at Sephora in Time Square. Unfortunately, Illamasqua is sold at very few Sephora stores. It is sold online, though. But I had debated between Milf, Purity, and Load, so I wanted to see them in person. When I was in NYC for my friend's wedding, I figured I'd stop in to Sephora to see if they sold Illamasqua, and obviously they did. Prior to me being aware that not all Sephora's carry this brand, I had gone to Sephora in Providence, RI and asked if they sold it. Now, I KNOW I pronounced it correctly, but the sales associate looked at me like I was an idiot, asked me what it was (and I told her it was a brand), and she told me she had never heard of it and they definitely didn't carry it. How are these sales associates not trained on brands their company carries? I know it's not sold on stores, but it's certainly sold on Sephora.com and she was just rude about it.

Anyway, onto the polish. And I have a forewarning (I love giving forewarnings!). Apparently, this polish likes to be photographed from the index finger side. So most of the photos are from that side. I actually don't think I liked ANY that were the pinkie side. I didn't really take many from the pinkie side, anyway. I think because there is no label on the bottom I was trying to show. I wasn't going to put so many because they're so similar, but then I decided what the heck? I went through the trouble of taking them! Lol. Anyway, you'll see what I mean.

Illamasqua Load Swatch

Illamasqua Load Swatch

Illamasqua Load Swatch

Illamasqua Load Swatch

Illamasqua Load Swatch

3 coats Load
1 coat Poshe

I actually LOVE this color, but I'm not thrilled about the formula. Ok, trying to stay mature through this... Load is an off white, yellow tinged creme. Yup. That's Load. It actually is a pretty unique color for a polish, and is quite lovely.

The problem was the application. You really needed 3 coats with this polish. The first coat went on sheer, with VNL, but buildable. It was the consequent coats that were troublesome. It seems as if you REALLY need to let each coat dry before you do another. I experienced cuticle drag and it was overall uneven. It's not terribly noticeable in real life, but my photos do a great job at showing the flaws.
Now, I am pretty darn good at shaping the polish by the cuticle. If you didn't know, I never do cleanup. I just paint neatly. This polish was a huge struggle due to the drag. You can see how the polish at my cuticle isn't very nice. And I tried REALLY hard. Again, in real life it's not that noticeable at all, but my macro photos sure do point it out.

Yucky cuticle drag!! (Seriously not noticeable in real life, though. Promise.)

Monday, May 9, 2011

10 Followers!!

Hey guys :)

I know this is a pretty lame post in comparison to those who have hundreds thousands of followers, but I recently reached TEN followers! I started this blog with the assumption that probably no one would read it because there are SO many nail blogs out there. And with only 10 followers, it's not like I became insanely popular. But you guys are so sweet and almost all of you have commented on my photos at least once. Others (Charlotte Sparkle) have commented on tons of photos and have even given me an award (more about that to come soon)!!

But regardless of if you've commented once, twice, or never, I want to say thank you. Thank you for following my blog, thank you for reading one post or looking at one photo. Just simply having 10 followers makes posting more fun. Seriously. And I hope that my posts and photos have been entertaining. I hope they have given you an idea on how you want to do your nails, make you want to pick up a polish you otherwise would have never thought to grab, or have shown you swatches that you were unable to find elsewhere.

With that, I'd also like to ask YOU who read my blog what kinds of things might intrigue you.
More photos? (even though I'm pretty sure I take more photos of a 1 dimensional polish than any other blogger! Haha!!) More tutorials? Video tutorials? More swatches? More water marbles? More Konad/Fauxnad? Less verbage? Less or more opinions? Nail care? Something else? You tell me. I'd love to improve my blog and keep it interesting for you guys who read it!!

And again, I want to really say a HUGE thank you to all of you. 10 followers might be nothing to someone else, but it's definitely something to me.

Sunday, May 8, 2011

China Glaze Gamer Glam and stupid USPS

I had my Mom choose my polish today and she picked Gamer Glam. She likes it to match my outfit (which I generally don't care about), so she had to know what I was wearing first lol.
I was initially planning on doing a dotted nail, but I had just bought dotting tools online and they haven't arrived yet. Oddly enough, they were in Shrewsbury, MA at 1 something in the morning... But then, 17 hours later they were in Nashua, NH. Let me point out that I live in CT. So in 17 hours, my package, which initially came from GA, went even MORE north than I live. I've tracked packages that go to Shrewsbury, but then they come to CT. Not New Hampshire. Even better, they then backtracked all the way to Wallingford, CT... and THEN, it will be partially backtracking AGAIN to get to where I live. Just because this is so astounding to me, let me show you a map (courtesy of Google) of all the destinations my package will have hit prior to getting to my house:

The path of travel is in order:
A - Shrewsbury, MA
B - Nashua, NH
C - Wallingford, CT
D - Where I live
The darker blue lines are because it had to travel back over the same route it already took. I really don't understand why the heck it went to New Hampshire, only to travel back the EXACT same route to get to Wallingford. Why didn't it just go straight from A to D? Ridiculous...

Anyway, onto Gamer Glam
Click the photos to enlarge them to see how much more gorgeous they really look!!

China Glaze Gamer Glam Tronica Swatch

China Glaze Gamer Glam Tronica Swatch

China Glaze Gamer Glam Tronica Swatch

China Glaze Gamer Glam Tronica Swatch

China Glaze Gamer Glam Tronica Swatch

China Glaze Gamer Glam Tronica Swatch

Not in sunlight:


Close-up
China Glaze Gamer Glam Tronica Swatch

2 coats Gamer Glam
1 coat Poshe

Gamer Glam is part of China Glaze's Tronica collection. There was a lot of pre-hype about this collection with very high hopes that it would be similar to their OMG or Kaleidoscope collections. OMG polishes are more of true linears, and Kaleidoscope polishes are a weird mix of linear and scattered holo. Ultimately, I think many people who anticipated this collection ended up being disappointed. The Tronica collection is not a linear holo collection. They are scattered holo. With that, I'm going to describe the polish to those standards, and not go on about how it's "disappointing" that it's not a linear holo.
For brief clarification on linear vs. scattered holos, I only have 2 (at the moment) linear holos from the OMG collection and NO polishes from the Kaleidoscope collection, so I suggest referring to this post by My Simple Little Pleasures. She does a great comparison of the collections. Linear holos make the entire nail look like one solid rainbow of color. Scattered holos are little speckles of rainbow holo all over the nail. I hope that makes sense.

Now, Gamer Glam. This is a light purple scattered holo. Typically with holos, you should use a specific made base coat for holos, or use a matte base coat. I got through about 3 nails and realized I did not use either of those things, so I'm just using a regular base coat. For what it is (a scattered holo), I think this is a lovely polish. Easy to apply, beautifully opaque with 2 coats, and no problems. Like all holos, sunlight is needed to get the full effect. However, indoors it has a very subtle holo effect that makes the polish look almost 3D. It's a very interesting finish that does not look glittery or shimmery. It's like a holo suede polish with a shiny top coat. Despite it not being linear, it's a great polish with a different quality. I do not recommend wearing this on a non-sunny day, though. Just because all holos need that sunlight to be fully gorgeous!!

Tuesday, May 3, 2011

Newspaper Nails (with Tutorial; alternative method)

If you cannot or do not want to use vodka, please CLICK HERE to see what else you can use.

Today, I have for you my first AND second attempts at Newspaper Nails.

What are Newspaper Nails?
It's when you use alcohol to transfer newspaper print onto your nails.

Wanna see my first attempt? Well, you can't. I tried the ways I've read on the internet about soaking your nail in vodka for so many seconds and then placing a strip of newspaper on it. I ended up with ink on my fingers, none on my nails, and super frustrated. I gave up after trying 3 nails max.

Wanna see my second attempt?


I think this came out MUCH better!!
My middle finger on my left hand was the first finger I tried, so I apologize for the smudge. I'm really, super proud of this, especially considering this was my first second attempt at it. If I were to do it again, I'd be more cautious about not moving the paper once it's on the nail. But also know that it does NOT look that smudged in real life. These are macro pictures and pick up EVERYTHING. It's the reason why you think you've done perfect cleanup, but then your photos capture every little spot you missed and it makes it look like you didn't clean up at all.
And, I also want to point out that the grainy-ness of the photos courtesy of blogger, makes them look even MORE smudged. They're not THAT bad. Click the photos to enlarge them so they look less grainy.

But I did NOT do the soaking method for several reasons:
1. I'm not that patient.
2. My nails are very convex, and trying to hold a piece of straight paper on them doesn't work.
3. I don't like newspaper ink all over my fingers.
4. You waste so much alcohol it's definitely considered alcohol abuse.
Ok, so not so much number 4, but the other 3 reasons are enough for me to not use the soaking method.

Here's what I mean about my nails being convex and not flat:


So you can understand why holding a flat, straight piece of paper on my nail is not easy. So...

Here's How I Did It (redo of my smudged middle nail)

Nail prep:
Paint your nails a light color.
China Glaze Sea Spray Swatch
I used China Glaze Sea Spray. Make sure they're dry.

What I Used:

1 nip of Vodka (I used Moon Mountain which is 80 proof and has 40% alcohol. It was just the cheapest one by the register.)
1 cotton round
10 nail-sized strips newspaper
Top Coat

How I did it:

1. I put some vodka onto the cotton round just as you would put nail polish remover on a cotton round.


**I made the "circle" of vodka bigger after I took this photo. Make it large enough so it will completely cover your nail with vodka**

2. I wiped over the nail I was about to newspaper. I initially held it there for 10 seconds, but found there was no difference in outcome between 1 second and 10 seconds. This also leads me to believe you could probably skip this step all together, but it can't hurt.


3. Lay a piece of newspaper on the cotton round with the side you want on the nail facing up. The newspaper will stick to the cotton round.

Note:
You could also put the piece of newspaper onto your dry nail and then cover it with the cotton round if this is not working for you or if you find that it moves around too much.

4. Press the cotton round with the newspaper piece onto your nail.


5. Make sure the cotton round is wrapped around the nail. Not fully wrapped around your finger, just make sure the whole nail is covered by the newspaper. Don't move it!!


6. After about 10-15 seconds, remove the cotton round and newspaper piece in one motion.


Voila! Newspaper nails.


Sorry it came out a little smudged. I promise it's possible to do this without smudging!! I was just concentrating more of the photo taking aspect than holding the paper still. And I was doing this with one hand since my other hand was holding the camera. Please don't do this one handed like I did!! Hold the cotton round with your other hand.

You can use a top coat immediately on the nail because the vodka will evaporate so quickly your nail won't remain wet. Clean up any print that got on your skin with a Q-tip immediately after doing the one nail or at the end. I used the vodka on the cotton round to clean it up after all the nails were done and topcoated.


And the final product!!
Newspaper Nails

This whole process was the first time I did it, and it took me... Ready for this?... 8 minutes. Yup. That includes everything(does not include nail painting. I already had my base coat on) like cutting the newspaper strips, getting all of my supplies together, top coat on all nails, and cleanup. AND one redo nail. Speaking of which...

What if one nail is smudged, crooked, or looks awful?
Just simply wipe over it with the vodka soaked cotton round and the print will come right off!! No need to use remover or repaint your nail.

Also on a side note,
I doesn't really matter so much what the text says because it's going to be backwards on your nail, anyway. However, there are areas in your paper that will have smaller print. I did not choose smaller print, I just chose the first article I came across. I was going to use the print on the backside of the article (which was smaller), but then I realized it was the obituaries. I just couldn't bring myself to put the text from someones obituary on my nails. Maybe just a personal preference, but at least something to think about... lol

I hope this helped!!

China Glaze Sea Spray

Remember!! You can always click my photos for better quality. Uploads to blogger tend to look grainy. If you click my photos, they won't be.

I'm loving China Glaze more and more lately. I usually gravitate towards Orly, but I've recently hauled a ton of China Glaze's that I'll be blogging soon. I don't plan on posting a haul of all of them in one post, but I'll mention they were part of my buying craze when I post them individually. The reason for the haul was that B2G1 Sally's and Ulta had. You can combine brands at Sally's, but not at Ulta. I hate when you can't combined brands!! Anyway, I got no OPI because OPI really isn't my favorite and I seem to repeatedly get disappointed by the polishes I buy. That and because Ulta doesn't combine brands, I wasn't going to try to find 3 OPIs I wanted. If they combined brands, it might be a different story... Anyway, I picked up a bunch of China Glazes and a couple of Orly's. I also grabbed two Essie's when Rite Aid had their B1G1 1/2 off with a $1 coupon.

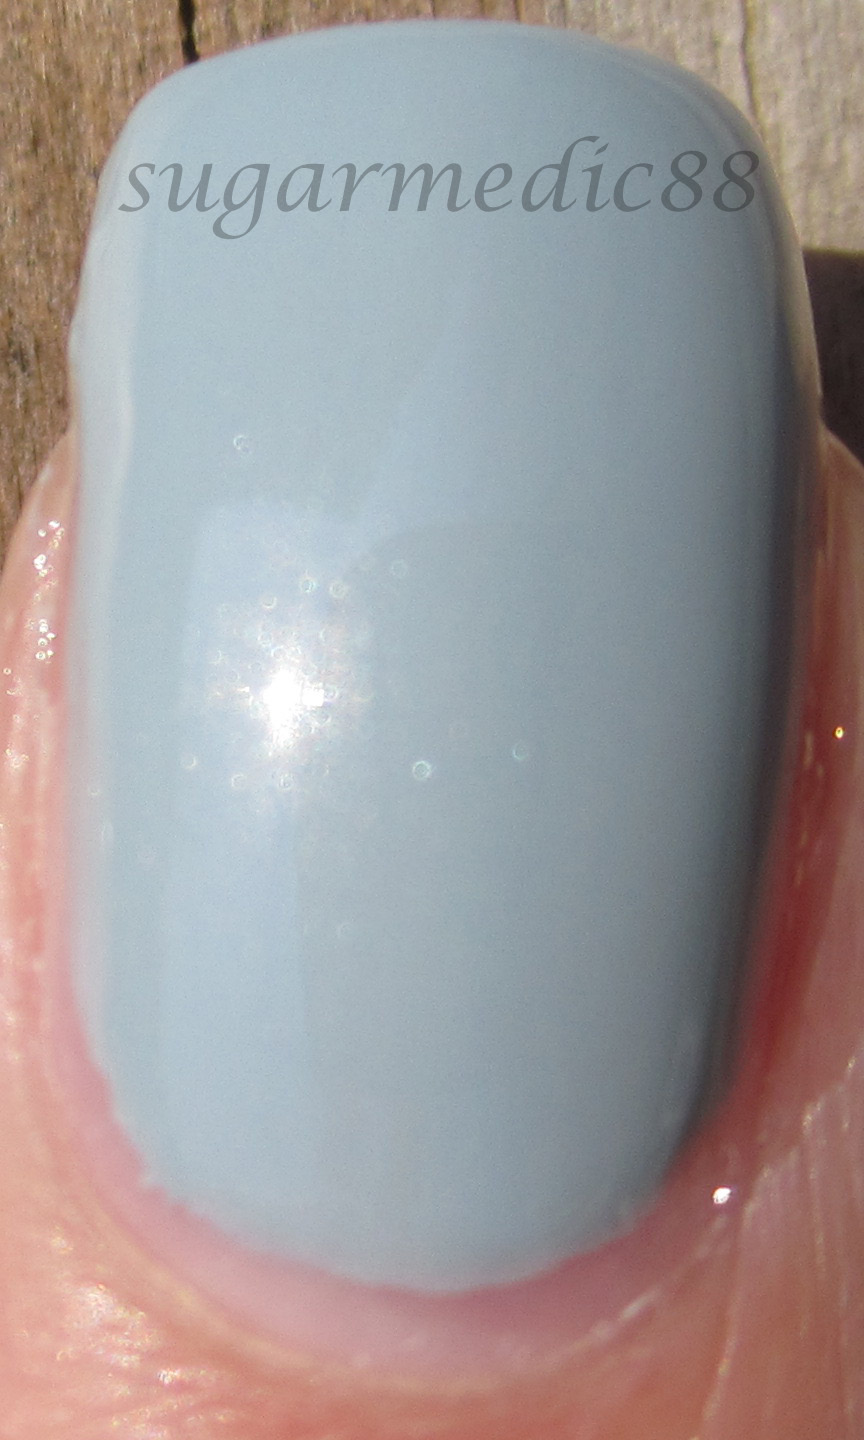
Today's nail is China Glaze Sea Spray. This color has been out for a little while, but can still be found at Ulta (it's not at Sally's). Be forewarned that I ended up choosing 10 photos of this polish that I loved. I may take some out, but tentatively, there are 10!!

China Glaze Sea Spray Swatch

China Glaze Sea Spray Swatch

China Glaze Sea Spray Swatch

China Glaze Sea Spray Swatch

China Glaze Sea Spray Swatch

China Glaze Sea Spray Swatch

China Glaze Sea Spray Swatch

China Glaze Sea Spray Swatch

China Glaze Sea Spray Swatch

China Glaze Sea Spray Swatch

2 coats Sea Spray
1 coat Poshe

This is a very, very opaque formula. You can get full coverage with just 1 medium-thick coat if you're rushing out the door. I went with 2 to correct some imperfections at the cuticle. It's so opaque, though, that if you're going 2 coats, try to keep them thin-medium. Mine went on a little thick. But with that, there was no cuticle drag and it was no uneven. With each brush stroke, it looked like it was going to be SO streaky because of the thickness and each bristle made it's own dent/smear through the polish. But it immediately evened itself out even before top coat. No signs of streakiness once done!

I'd describe the polish as a very blue toned grey or a very grey toned blue. It's one of those colors you could go either way with because it has such strong hints of each. Reminded my mother of Kate Middleton's mom's dress she wore to the wedding. People questioned maybe it's a powder blue, maybe more of a grey.
This polish also has shimmer in it, though you'd never know on the nail. The bottle does have this shimmer/sheen to it, but it looks totally creme once on. It also looks darker on the nail than in the bottle. But really, it looks SO SO SO creme on the nail I had to work with the camera for you to be able to see the "shimmer" in a few of the photos above. I'm not complaining about the lack of shimmer, though. It would be nice if it were more prominent because it would have added an interesting dimension. But the color is so interesting and dynamic on it's own that I don't think the lack of shimmer is disappointing.

Song:
The Ataris - In This Diary
I'm really slacking with posting songs!!

Sunday, May 1, 2011

Ardene Red Sapphire and Guest Nails!!

If you've look through my blog, you've probably noticed I don't frequently wear typical nail polish colors. One color I very seldom wear is red. I'll wear pinks, sheers, nudes, anything before red. I just am not the biggest fan of red. When I do wear it, however, it's usually for a specific reason, not just because I felt like wearing red that day.

So what's my reason for choosing red today? To match my nails with someone else's nails... Keep reading to see whose!!

Ardene Red Sapphire Swatch

Ardene Red Sapphire Swatch

Ardene Red Sapphire Swatch

Ardene Red Sapphire Swatch

Ardene Red Sapphire Swatch

And my special guest...

Dog Nail Polish


This, is my amazing dog Paisley. She's a 16 month old Jack Russell Terrier that I am ridiculously in love with!! She had to get her nails clipped today, so why not have them painted, too!? This is her first manicure, because I don't have dog polish and I'm afraid to use regular polish on her nails. This is courtesy of out local Petco :)

2 coats Red Sapphire
1 coat Poshe

Ardene is a Canadian brand that sells clothing, accessories, and some cosmetics. I've actually never been there. My boyfriend went to Canada for a bachelor party. Apparently at some point, he managed to stumble himself into a store and bought me 6 Ardene polishes. Lol, he's too funny.

This is actually a very nice quality polish. The brush is great with a nice spread and no random bristles sticking out. It's opaque in 2 coats, and interestingly, the first coat made it seem like it had a jelly-ish quality. Even with the 2 coats, it still has that jelly look, definitely not just a stark creme. It went on very smoothly, no drag or streaks. If you're from Canada and come across this polish, I definitely suggest picking it up if you like one of the colors!