Pages

Showing posts with label Matte. Show all posts

Tuesday, June 14, 2011

Summer Neon Crackle

I hate Black Shatter. I keep trying it, and keep hating it. I think a big part of it is because it's summer (spring), and when I think polish for summer/spring, I definitely don't think black. Overall, though, I'm not a huge fan of the crackle trend. I haven't been tempted to buy the new OPI crackles... the Sally Hansen crackles... the Pure Ice crackles... you get the idea. (Though I may grab some of those new metallic China Glaze crackles when they come out).

In an attempt to jump on the crackle trend, I finally found a combination I'm satisfied with.


1 coat of an unknown super old neon pink Orly
1 coat China Glaze Lightning Bolt

I've been DYING to do this for months. Literally months. I had it in my head and just knew I'd love it.

But where's my pinkie you ask?


Busy being injured. Super bad break after slamming my finger into a door (not in a door, into a door). I don't even know what to do about it.
More about it later, but if you're curious and might have some suggestions on what to do in the meantime *cough*Loodie*cough*, please let me know!! (I'm thinking silk wrap but I don't know if the glue would be a bad idea because it broke to the skin).


Keep in mind there's strengthener on my nail that started to peel up near the break, too, so it looks kinda odd. I'm afraid to remove it because I think the remover might sting.

Monday, May 16, 2011

How To: Camouflage Nails Tutorial

Yesterday I described OPI Stranger Tides as a "pale camo, murky sage". The camo description was the inspiration for this nail.


My first attempt I wasn't happy with, and you can see the end result and the steps leading up to it at the bottom. If the first part of this post isn't your thing, maybe you'd like how I did it in the second part.

Polishes and Materials Used:
OPI Stranger Tides (base)
Poshe
Love & Beauty (Forever 21) Camel
Zoya Shawn
Orly Prince Charming mixed with a TINY bit of Sinful Black on Black
Top Coat (Essie Matte About You, OPI Top Coat)
ELF Studio Angled Eyeliner Brush (available in Target stores for only $1)

Obviously very simple. I started with the lightest color and ended with the darkest so I wasn't trying to put light over dark. This is how it progressed after each added color:


I think I put the top coat on too soon, because it did smudge a tiny bit. It's noticeable in the photos, but not noticeable at all in real life.


If you don't like it matte, I added a clear top coat to it to see what it looks like shiny:


This was my first attempt.


So as I'm creating this post, I've already taken off that camo nail, repainted with Strange Tides, and I'm waiting for it to dry. As I look at the photo, it doesn't look that bad, actually.

In this order I used:
Base Coat of OPI Stranger Tides
1 coat Poshe
Love & Beauty (Forever 21) Camel
Zoya Shawn
Orly Enchanted Forest
Orly Prince Charming
OPI Stranger Tides (again)
Essie Matte About You x2

Ultimately, I didn't like it because it wasn't abstract enough. I thought it ended up looking a little too busy. In hindsight, I should've stopped with just the three colors and added a little more Shawn and been done. But instead, I continued with Enchanted Forest, which blended too easily with Shawn. Then I used Prince Charming, which really made it look messy, and to try to offset that, I added more Stranger Tides. I shoulda quit while I was ahead and it was simple. But if you're curious about the steps I did for this nail (maybe you like it?), here's a quick run through. Sorry some photos are somewhat blurry. After Enchanted Forest I knew it was going down hill and didn't concentrate too much on taking nice photos. And you can see that the polish looks chunky throughout the process, but once Matte About You was added, it evens everything out.

Click to to enlarge it if you'd like.

Wednesday, April 13, 2011

All Rose Lead to Rome Matte with Konad

I loved wearing ARLTR on it's own, but I had envisioned this concept when I knew I would be wearing ARLTR for two days. I had intended to use a different Konad design (it was actually an Essence plate), but unfortunately after 3 attempts to pick up the image, there was the same corner missing on a flower. I wanted the border look, so I had a Konad plate stored with the Essence plate, and just went ahead with this new design. Here it is:

OPI All Rose Lead to Rome Swatch Konad

OPI All Rose Lead to Rome Swatch Konad

OPI All Rose Lead to Rome Swatch Konad

OPI All Rose Lead to Rome Swatch Konad

OPI All Rose Lead to Rome Swatch Konad

OPI All Rose Lead to Rome Swatch Konad

And a close up of the design
OPI All Rose Lead to Rome Swatch Konad

2 coats All Rose Lead to Rome
1 coat Poshe (from the previous day)
2 coats Essie Matte About You
Konad Plate m36 with white Konad polish

Friday, April 8, 2011

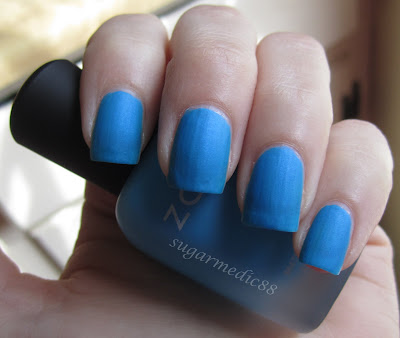
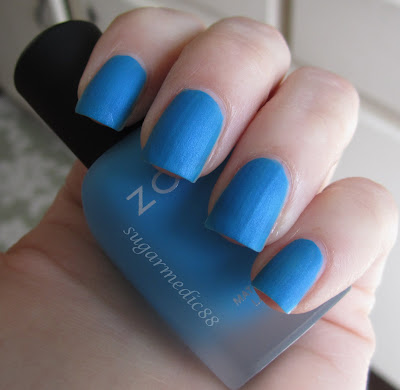
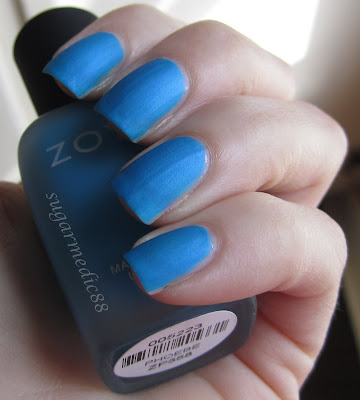
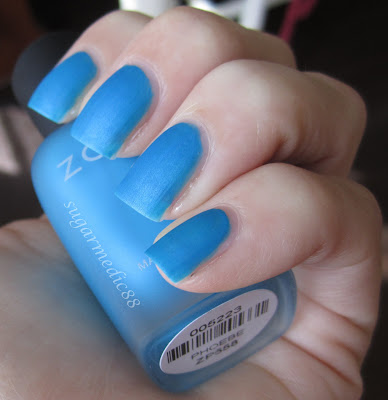
Zoya Phoebe (finally!!)

In the Zoya BOGO promo, I picked up Phoebe and Faye. I received Faye a while ago on March 25. Just yesterday (April 7), I finally received Phoebe!! As much as I wanted to just wear Phoebe as soon as I got it, I knew I'd want to give myself a good full day (at least!!) of wearing Phoebe, so to put it on at 3 in the afternoon would have been pointless.

I have to mention how Phoebe came packaged. You totally know someone in the warehouse had a super fun time make sure this package was well secured:


Anyway, onto the good stuff!!

Zoya Phoebe Swatch

Zoya Phoebe Swatch

Zoya Phoebe Swatch

Zoya Phoebe Swatch

Zoya Phoebe Swatch

Zoya Phoebe Swatch

3 coats Phoebe

I am really really disappointed in this formula. Like REALLY disappointed. I have Veruschka, which is also a Zoya matte, and these two formulas are totally different. Veruschka is technically considered "matte velvet", but Phoebe gives that same velvet finish.
Phoebe was horrific. You could not paint over the same area twice without dragging up all of the polish you just put down. Thank goodness Zoya brushes aren't like the big, chunky OPI ProWide brushes (which I'm not a fan of). You had to use a very delicate touch and work quickly. You also have to have the patience to put on this polish. Don't try to swipe this on your nails and run out the door. It needs a little care and babying. I feel like 4 coats might have made it a bit smoother, but I was satisfied with 3. Once I got the hang of it, it wasn't THAT bad, but it's still not an easy polish to apply.

What I suggest when using this polish that will make application easier:
♥ Work quickly
♥ Oversaturate your brush
♥ Minimize brush strokes
♥ Use a light touch

Oddly enough, I feel like I wanna have another go at using this polish, but I'll hold off for now. I'm sure I'll be wearing this again in the coming months.

Oh, and I've decided I'm going to try to do something a little fun with my posts. Ok, not that fun really, but I'd like to look back on it! When I post, I usually type this out while working on choosing my photos and watermarking/cropping them. But I also am usually listening to music. So I wanna start posting the song I'm listening to when I'm typing. Obviously this process takes me longer than a 4 minute song, but I'll just write what I'm listening to at the time I'm ready to write it.
Anyway, right now my iTunes shuffle has got me listening to:
"Ticks" by Brad Paisley. As I type that, it switches me to "Dare You To Move" by Switchfoot.

Usually I'm listening to some awesome 90s song, but not this time. Be prepared for a huge range of music!!